Managing your Contacts in Business PBX
Share:
One of the frequently asked questions we receive when deploying a Business PBX system is how users can manage external contacts.
There are several methods to add and manage your contacts in 3CX; it’s important to understand the types of contacts and their respective managers. There are two types of contacts:
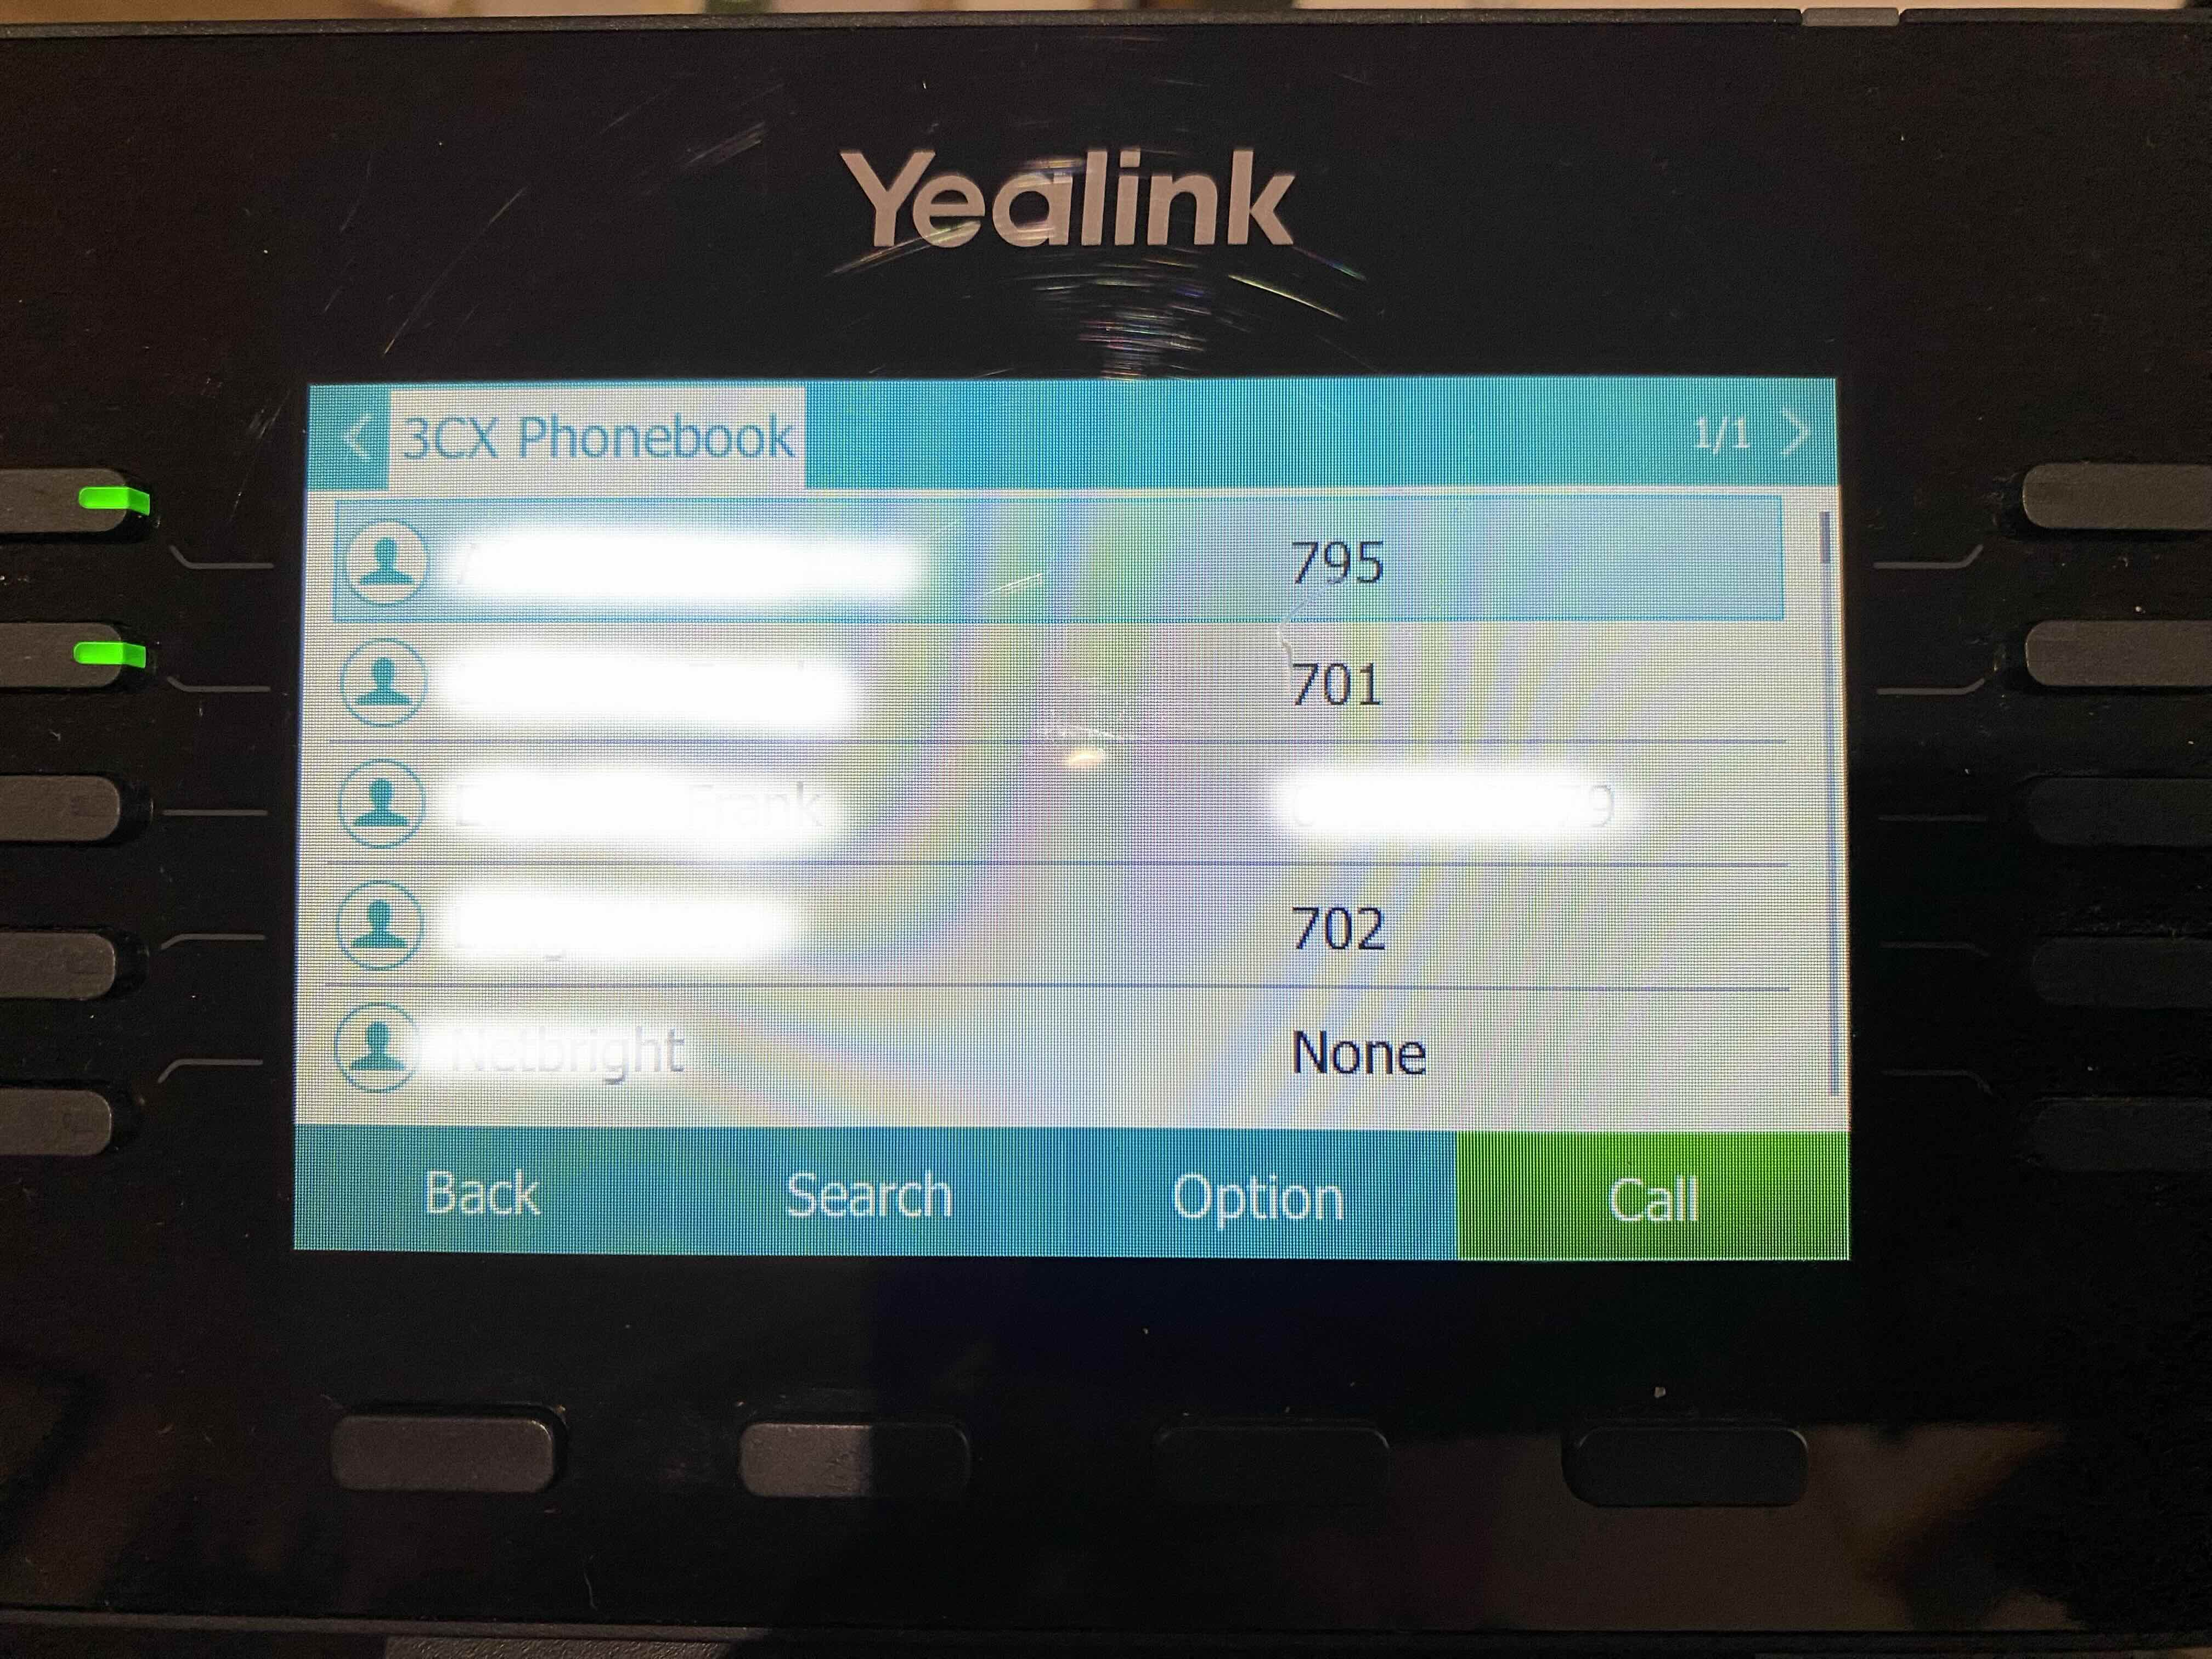
It’s also important to note here that only company contacts are available on a physical handset – this is the list you see when you choose the 3CX Pbook soft key, shown below.
However, as we discuss below, we recommend adding personal contacts from the web browser – you can then call those contacts directly from your handset.
Personal contacts can be added in a number of ways, depending on whether you use a handset, the web browser or the mobile app. We cover here the recommended way of using the web browser interface.
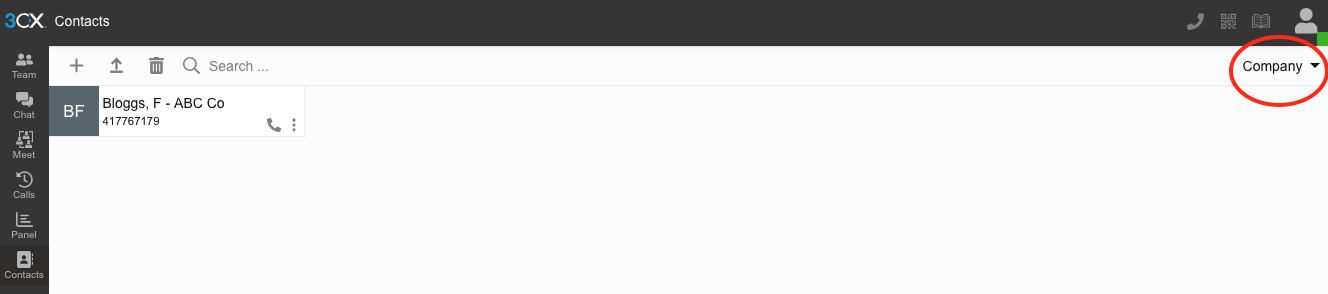
To add contacts via the web interface, login to the system using your email and password, then choose Contacts from the side bar. You will be presented with a screen similar to that shown below.

To add a new personal contact, first choose Personal from the top right dropdown menu. Then click the plus sign (+), fill out the fields shown then click the Save icon on the top right to save the contact. Note that’s important to use the Mobile field to store the number you want to use to dial your contact.
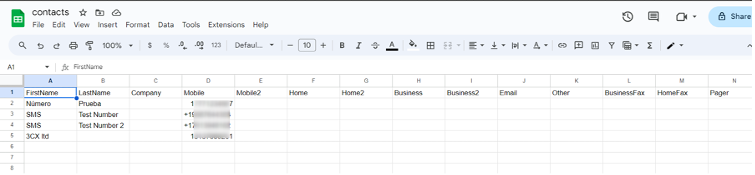
If you have your contacts saved in a spreadsheet, you can do a bulk import by clicking the Import icon; use the fields as shown below to build your list, or click here to download a template. Note that you need to save the file in CSV format before importing.
To dial a personal contact, you have a few options depending on the device you are using. If you’re using the web browser or the mobile app as your interface, its straight forward – choose the Contacts icon, find the contact and click or tap the icon to call.
As mentioned above, personal contacts aren’t available from a handset, but you can use the web browser to dial contacts from your handset. To set this up, from the web browser choose the Dialer icon, then in the popup panel, choose your handset from the list of devices shown in the dropdown menu - see below.
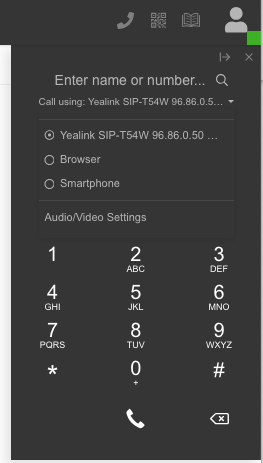
Once you have this configured, dial the contact by clicking and the call will be placed from your handset.
As discussed above, company contacts are available to everyone in the organisation. This option is useful if your organisation has a list of contacts that a number of users need to call on a frequent basis.
Adding company contacts is accomplished by a system administrator using the same process for personal contacts. Note that you need to ensure that you choose the Company option from the top right dropdown before adding any contacts.
Once added, company contacts can be dialled from the web browser, mobile app or from the handset directly using the 3CX PBook soft key.
Finally, there are options for integrating company contacts from Microsoft 365 or your CRM system. If you would like to explore these, please contact us.
In this article we covered the basics of the types of contacts in the system, how to add and access personal contacts, and how you can use company contacts to make shared contacts available across the organisation.
For more information on Business PBX and how you can leverage the system for your business, don’t hesitate to contact us.